|
|
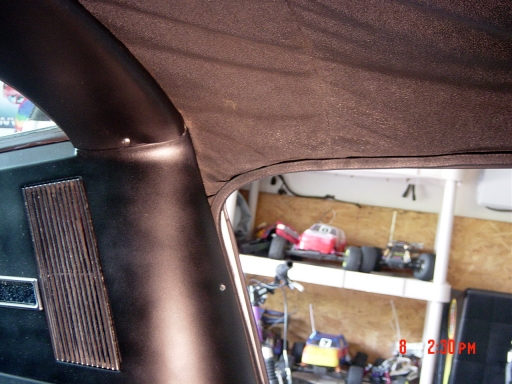
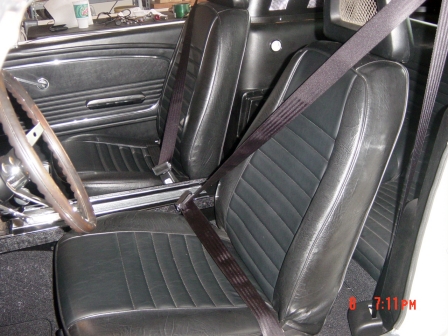
Modern seat belts should be a required modification for early model Mustangs. The steering column of the 65-66 models is a steel spear and has no give in an accident. I'd been trying to figure out how to install an upper pivot point for some time, when BigWig posted on MustangSteve's website some photos of his early model with these seatbelts installed. He explained that there was existing structure behind the headliner that would support a 3 point seatbelt pivot. Shown here installed are modern inertia reel units which, when pulled across, provide both lap belt and shoulder restraint. They are much safer than standard lap belts |
|
Shoulder Mount: |
|
The units installed
here are from Wesco
Performance. They are their 140" Universal fit 3 Point
Retractable Seatbelts. I order them in Black, with the Bucket Seat Sleeves and
the mounting hardware kit.....
Right: Shown is the original driver's side setup: Headliner, sail vent panels, center overhead trim, and Windlace are all still in place. Depending on the headliner, some or all of these have to be removed for access to the structure. |
|
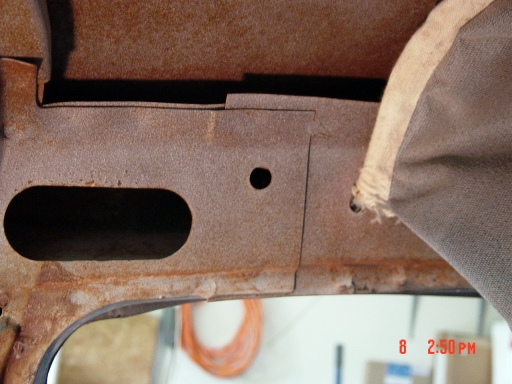 |
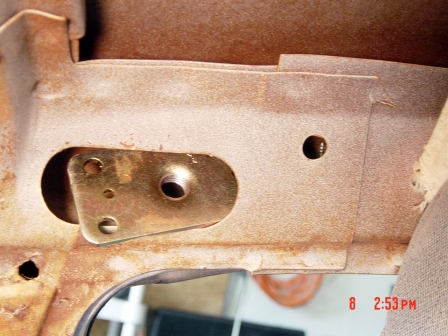
Once the trim is
removed and the aft section of the headliner is pulled forward to the last
bow, the overhead frame structure is revealed. The large access hole
provides for a good location to fit in the seatbelt upper pivot mounting
plate.
The mounting plate could be trimmed to mount behind the existing hole shown, but I choose to relocate the hole as shown in the steps below. |
|
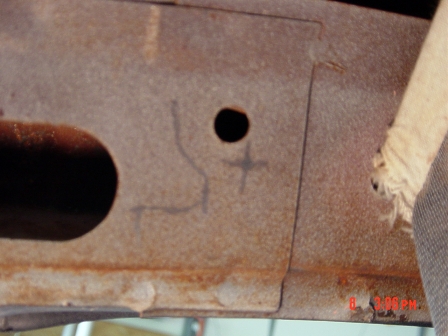
Near Right: The
mounting plate slides into the access hole and slides forward till the far
edge bumps against the existing headliner bow.
Far Right: The structure actually overlays and forms two thickness of metal. The pencil line defines the actual edge of the under lapping metal. |
|
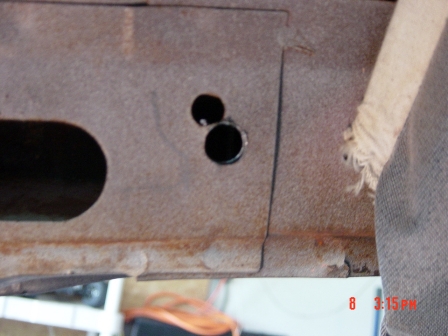  |
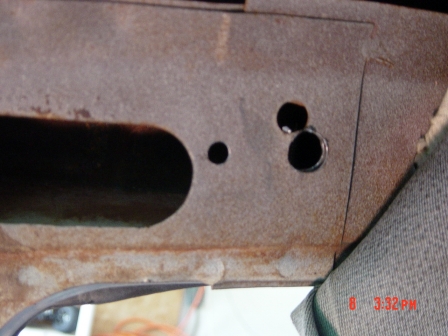
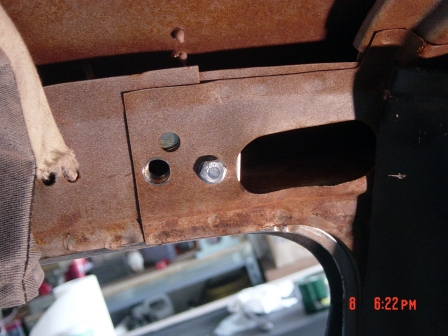
I chose to relocate the hole lower and forward of the existing hole, and still within the two layers of structure. It's an ugly snowman hole, but any crash loads will be forward and down, and the plate is large and will be securely mounted to the frame.. |
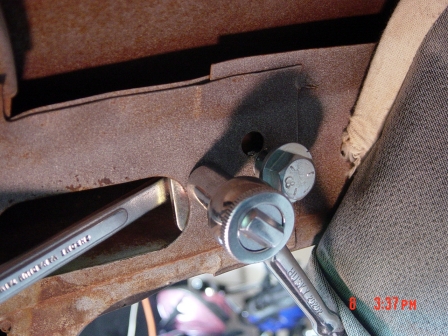
| The 1/4" hole in the mounting plate is upsized to 9/32", and is used as a guide to locate and drill a 9/32" hole in the frame. The mount is attached with a Grade 8, 1/4"-20 Nut/Bolt. The Shoulder Bolt is installed and used to ensure proper alignment. |
|
 |
Shown Left is the
passenger's side of the vehicle, with the mounting plate installed and the
1/4-20 bolt secured. Inside the skin, the mounting plate is resting on
the lower structure.
Did a little better job on this side! Hole isn't as close. However, I had to grind down a part of the mounting bracket to make it fit here. |
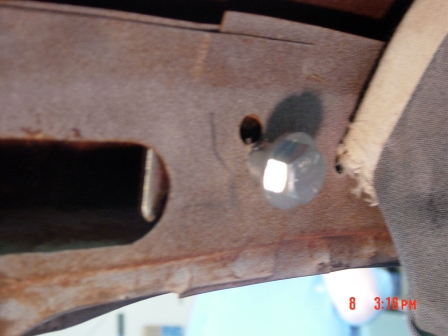
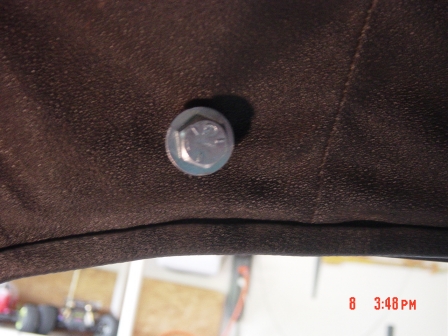
| Once the headliner is reinstalled, the hole can be cut open and the pivot bracket and shoulder bolt can be installed. Once the bolt is torqued down, the shoulder of the bolt will rest against the outer metal, sandwiching the over head frame between the mounting plate and the bolt. |
|
|
Floor Mount: |
|
|
Forward mounts are
standard and use the existing holes from the original lap
belts.
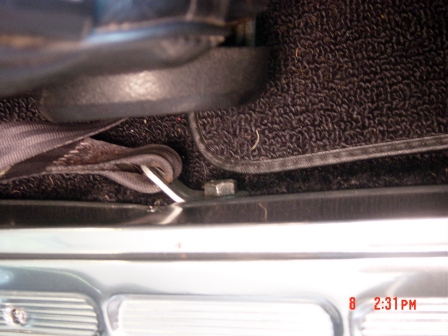
Below Left: The end of the belt is installed along the outer framerail edge, into the existing holes. I used the original seatbelt bolts, as the hardware received with the kit was too long for this use. Below Right: The inboard belt sections are secured into the original bolt holes, which are welded threaded areas in the driveshaft tunnel. If you use the new hardware, be sure to check that the additional length doesn't interfere with anything under the car, such as hitting the exhaust pipe, fuel or brake lines, etc... |
|
 |
|
|
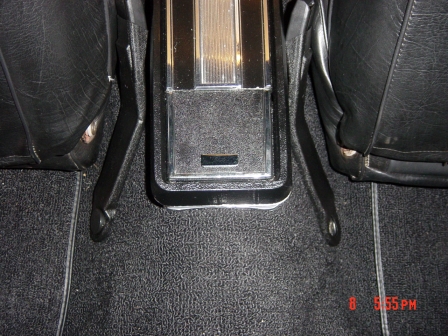
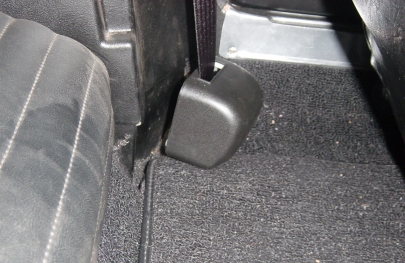
The inertia reel
mechanism is secured to the rear floorboard. Location is at your
discretion, however be aware that there are better places than others to
bolt down the reel. I chose the corner in order to place the
attachment in a stronger place.. The mounting hardware kit comes
with a right angle bracket that should be used to secure the reel through
the floor.
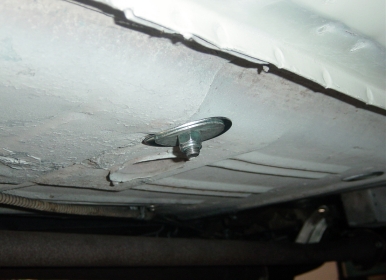
Lower Right: The attach bolt is secured to the underside of the floorpan with a self locking nut and large washers to spread the load. |
|
 |
|
|
Position: |
|
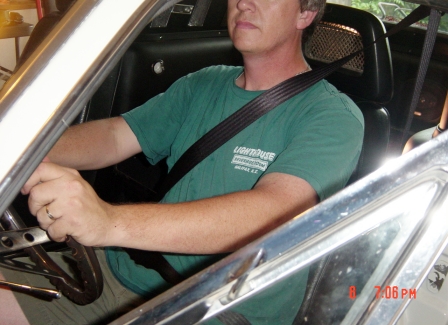
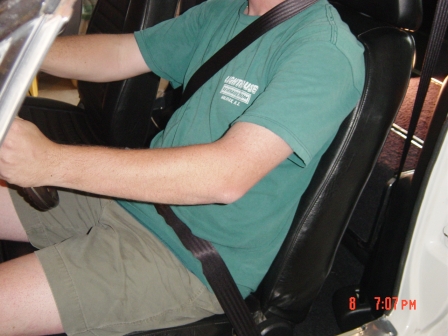
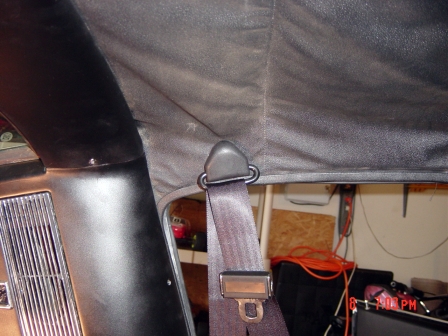
| Position of belt relative to the driver. I was concerned about the shoulder strap being too far up, but the strap fits and feels just like any other modern pillar mounted shoulder strap. | |
|
|
|
|
August 2004:
Once again, the information provided on this page is for information purposes only. I share it as personal experiences only and make no claims as to the safety, reliability, or fitness for use of the modification or the material used. Any decisions to copy or use this information on another's vehicle is done solely at their on volition and risk. Users accept responsibility for their usage of information from this site through their viewing of this page and reading of this disclaimer. Questions? Email me. |
|